How to make a Fairy bread house

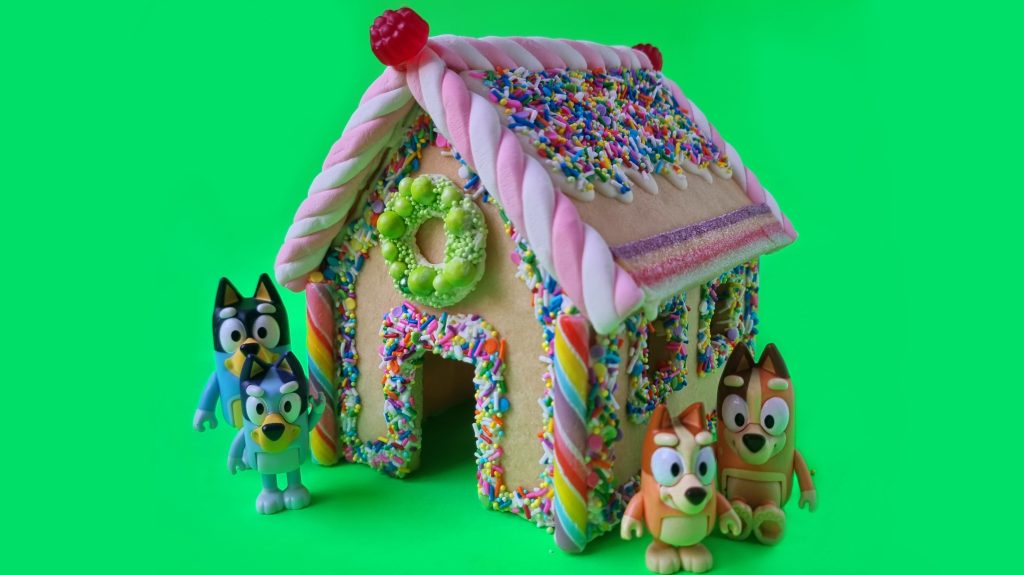
A fairy bread-style twist on the classic Christmas house creation! To bake and build your fairy bread house, follow these steps…
Note: Make sure a grown up helps with small pieces, preparation and baking.
Ingredients
- 3¼ cups (406 g) all-purpose flour
- ¾ tsp salt
- 1 cup (227 g) unsalted butter, softened
- 1 cup (200 g) caster sugar or superfine sugar
- 1 large egg
- 2 tsp (10 ml) vanilla extract
- As many sprinkles as you can get your hands on! Multicoloured for the house, and green for the wreath
Method
- In a medium bowl, whisk together the flour and salt.
- In the bowl of a stand mixer, cream the butter and sugar with the paddle attachment on medium-high speed until fluffy, approximately 2 minutes.
- Add the egg and vanilla and beat for another minute. Scrape down the sides of the bowl. Add the dry ingredients to the bowl and mix on low speed until combined.
- Take the dough and wrap in plastic wrap. Flatten it with the palm of your hand to make a disc approximately 1 inch (2.5 cm) thick. Chill the dough in the fridge for 1 hour.
- Remove the disc of dough from the plastic wrap and place it on a cutting board covered with a sheet of parchment paper.
- Roll it out with a rolling pin until it’s approximately ¼ inch (0.5 cm) thick and then place the board in the fridge to chill the dough for 15 minutes.
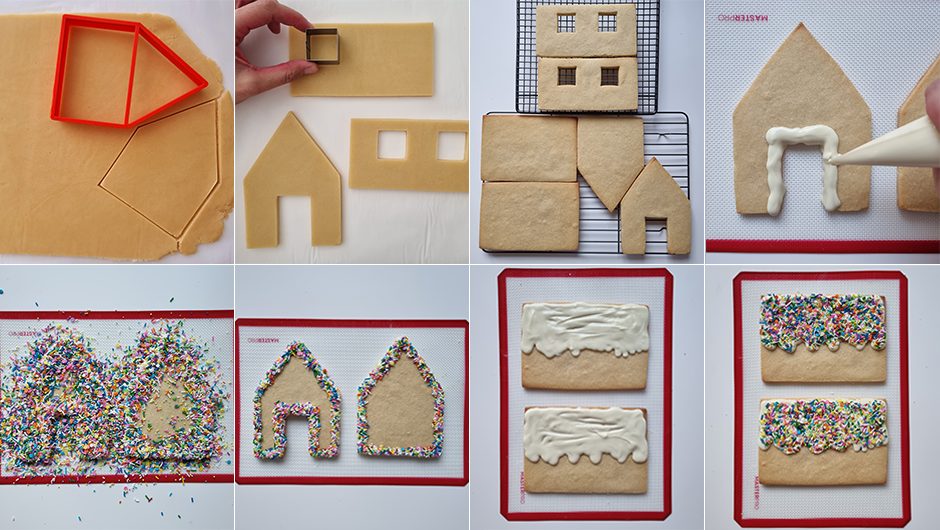
- Remove the sheet of chilled dough from the fridge and use a gingerbread cookie cutter kit or printed templates to cut out the front, back, sides and roof of the house.
- Use a rectangular cookie cutter (or knife) to cut out the front door and a small square cookie cutter to cut out the windows.
- Place the cookies on a baking tray lined with parchment paper and place it in the freezer for 30 minutes.
- Preheat the oven to 355៰F (180៰C).
- Remove the tray from the freezer and place it immediately in the oven. Bake on the middle rack for 12 minutes, rotating the tray half way through. Depending on how big your cookies are, they may need slightly more or less time. Once the edges just begin to turn golden brown, they are ready.
- Allow the cookies to cool for 10 minutes on the baking tray before transferring them to a wire rack to cool completely.
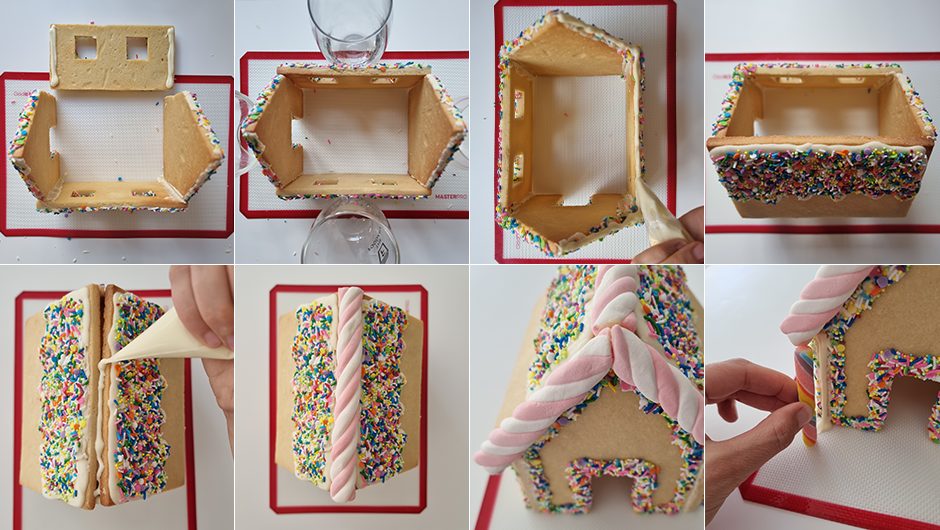
To construct the cookie house (images below):
- Melt approximately 1 cup (170g) of white chocolate.
- Fill a piping bag with the melted chocolate and drizzle around the edges of the cookies (not the roof).
- Pour sprinkles over the cookies to ensure all the chocolate is covered. Once set, tip the cookies upside down to remove excess sprinkles.
- Drizzle the melted chocolate over the top half of each “roof cookie” and cover in sprinkles, repeating the process from step.
- Once the chocolate on all the cookies has set, stand them up in their correct positions with glasses (or any stable objects) to hold them in place.
- Once in their correct positions, begin piping the melted chocolate as “glue” to hold them together. If your chocolate has begun to set by this point, just reheat it.
- Once the front, back and sides have been “glued” together and the chocolate has set, pipe the melted chocolate over the top edges and stick on the two remaining cookies to form the roof.
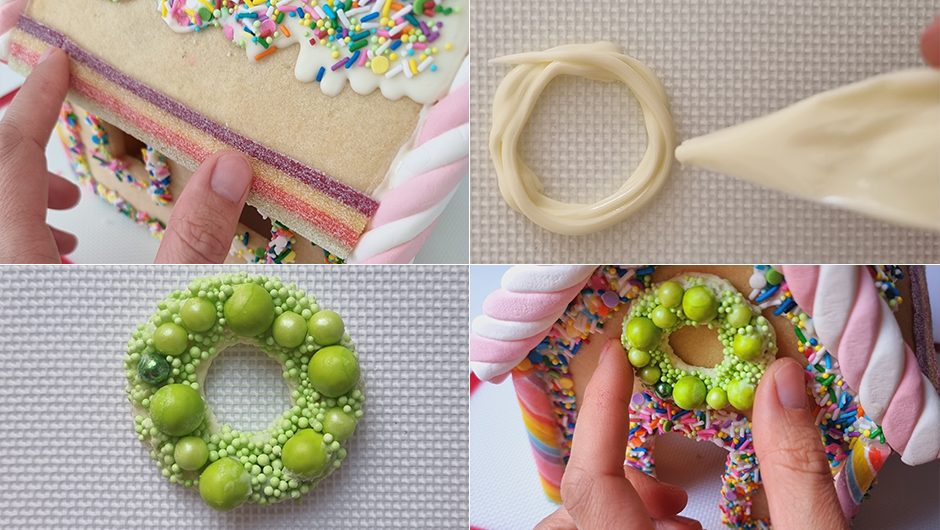
- As soon as the roof is secure and set, begin piping melted chocolate where all the cookies have joined, to conceal any gaps. Cover the chocolate in lollies of your preference.
- Pipe the melted chocolate to make a circle. Go over it three or four times so that it’s nice and thick, then place green sprinkles over it to make a wreath. Once set, use the melted chocolate to “glue” the wreath to the front of the house.


